Showing posts with label misc crafts. Show all posts

Sunday, September 18, 2011

Ninja Jewelry Holder Tutorial

Oh, look, it’s me!

Need a jewelry holder? Well, you’re in luck because I did too and, because it’s me, you know it had to involve ninjas or mushrooms.


Even better, it resulted in a tutorial for you!! You know, because I’m cool like that. :)

Ninja Jewelry Holder Tutorial

Step 1: Assemble your supplies.


For this jewelry holder, I used 2 thrifted crystal plates that I got for $2, an old shot glass, and a ninja toy. Make sure that all of the pieces are thoroughly cleaned and dry. You are also going to need some glue. We had some E6000 at my house, but you could probably use any glue meant for glass and be cool, too.

Step 2: Glue.


Put glue on the center of the plate that you are using for the bottom of the jewelry holder and on the bottom of the ninja.

Step 3: Apply ninja.


Put the ninja in the middle of the plate (on the glue you just put there) and press down for at least 10 seconds to secure the bond of the glue just a little. :)

Step 4: Glue the glass.

Put glue all around the edge of the shot glass. Be careful not to put so much on that it drips down the side of the glass. It’s not the end of the world if it does--it just creates more work for you because you’ll have to clean the excess glue off before it dries.

Step 5: Encase the ninja.


Lower the shot glass over the top of the ninja being careful not to get glue on the ninja. Press the shot glass down against the plate for at least 10 seconds to secure the bond of the glue.

Step 6: Glue, again.


Put glue on bottom of shot glass and bottom of the plate that you are using for the top of the jewelry holder. 


Press down on the middle of the top plate for at least 10 seconds to secure the bond of the glue.

Step 8: The Waiting Game.

Let the jewelry holder dry for at least 24 hours.

Step 9: Enjoy!


Put your jewelry on your new jewelry holder and enjoy!

Have you tried this tutorial? Post a picture of what you put inside your shot glass! :)

Sunday, May 29, 2011

Insomniatic Jam

It was a productive bout with insomnia about a week ago. Not so much tonight. Oh well, I'll just eat the jam instead of make it this time. :)

Strawberry Freezer Jam made at 1:00 am
It's tradition! May wouldn't be May without freezer jam.

Monday, December 13, 2010

Things that start with the letter P

The theme of today's blog is: Things That Start With the Letter P

And I haven't even been watching a lot of Sesame Street lately. :) Just a strange theme of my life lately.

Let's begin...

Patches
The boy is rough on his clothes. He's 2 years old and wears holes in the knees of his jeans like they're made of paper. The jeans are perfectly good otherwise, so I wasn't willing to throw them away. Not with a perfectly good stash of fabric to use for patches!

So, Bubba and I raided the fabric stash and he came out with a totally awesome new look for his previously holey jeaned self:


And I came out with 4 hours less of my life (who knew patches took so long to sew on pants!?!) and a couple of holes in my fingers. But he loves them so I think it's totally worth it.

Puckerooms
Mushroom shaped candy. Apparently they're even sort of good for you what with being made with natural ingredients and 25% real fruit juice and all...


Why have I not heard of these before!?! These bad boys are right up my alley. My dentist will be rich!

Purse Pick-Me-Up
My sister gave me a lovely purse for my birthday. She's the purse queen and takes her purses very seriously. So imagine her heartbreak when she realized the zipper on it was off center after I had torn open the wrapping paper on the big day.

I, on the other hand, was perfectly happy. It was a sweet gesture and I had a fabulous idea to make the purse look like there was no defect at all. My sister was skeptical, but she has faith in my crafty abilities.

Here's what I came up with:


I'm working on a small mushroom and some flowers, too. That way I can switch them out when I feel like something a little bit different. Thanks, sis!


So those are a few projects that I've made in my free time lately. What have you all been up to?

Monday, November 1, 2010

And out of the shadows comes...

Me!! :)

Hello! It's been so long and I've missed you!! Thank you for waiting around for me to get back.

The last months have been C-R-A-Z-Y! As I mentioned in the last post, we had two family members who were injured in the course of about 1-2 weeks. There were added duties and emergency road trips to be had. One is well again and the other has a very long road to recovery (LOVE YOU). And, in the interest of maintaining their privacy, I'm not going to go into what happened exactly. Bad stuff occurred. Now they're working to get well again. And we love them. And miss them. And stuff.

Any how, I'm glad to be back, that's for sure!

I thought the day after Halloween would be a fabulous time to return to blogging. You know, that way I could show off these babies:

Asajj Ventress


Anakin Skywalker


That's right, I made costumes this year. Star Wars Clone Wars costumes, to be exact. It was a lot of fun even if it was one more project (or three) that was keeping me away from here. And I've noticed that the more sewing knowledge I gain, the less sewing disasters I seem to have. And less disasters means it takes less time to get projects completed. Go figure. :)

(Plus, believe it or not, they don't sell Ventress costumes for kids. At least none that I could find. So there weren't a lot of options there. )

Making the Ventress costume gave me the opportunity to practice freezer paper stenciling technique again. Although, I'd like to say that I found out that freezer paper generally doesn't stick well to felt. Lucky for me, I had my face 10 centimeters away from what I was doing and noticed the freezer paper not doing it's job (yer fired, freezer paper) before I smeared paint on parts of the fabric that I didn't want it.

Also, french seams are freaking amazing and surprisingly easy. Learned that tidbit sewing the Anakin costume. :)

Julie 1 - Crafting Disaster Fairy 0

It was a good (holi)day.

So, what were you guys for Halloween? I'm excited to find out. Here is my costume:

Monster
While I made this one, I totally got the idea from Polkadot Robot. I had fully intended on buying one from them rather than making one myself, but I spent too much time deciding on a costume which didn't leave enough time for shipping to Alaska. You should totally stop by and check out their hoodies, though. They have some really cute characters to choose from.

Monday, August 23, 2010

Spontaneous crafting

My husband replaced a part of the sound system in our living room the other day. After he was done, my son found about 10 inches of speaker wire laying on the floor where he had been working.

Rather than throw the plastic coated wire away and grumble about how it got left behind in the first place, I had a bright idea.

Why not bend it up into the shape of a mushroom?

Three minutes after I had this bright idea, I was pinching the bottom of a four inch mushroom shape closed. But why stop there, really?

We happen to have a bunch of different colors of electrical tape just begging to be used for a project like this.

So, I grabbed the tape and wrapped up the mushroom shape to get this:


Ten minutes of spontaneous crafting and I've got a cute little wall hanging.

(And, for those of you keeping track, I just saved 6 inches of wire from going to the dump. Eco-friendly craftiness, anyone?)

Keep in mind that while the tape makes the wire shape a little bit more sturdy than bare wire, this shape isn't indestructible. In fact, it is quite destructible. So if you make one too, then you may want to use it as a decoration.

Wednesday, August 18, 2010

What's Your Creative Style?

As you know from my Blogtastical Goodness page, I read the How About Orange blog pretty regularly. It's a fabulous blog with posts that usually contain something that you can take away into your own creative life. Font types, projects, labels, tutorials, or even quizzes like the one I'm going to share with you from Psychologies magazine. (Plus, the blog celebrates the color orange. I support supporters of orange.)

Because I took it.

And it seems to be pretty accurate.

I mean, the title for my results is: Creativity enriches you

Yep. That sounds about right. 


Here is some more of what the What's Your Creative Style? quiz had to say about my creative style:

Creativity is separate from the real world for you. But it’s a magical world in which you like to immerse yourself. When you’re involved in it, you get the wonderful sensation that there are no limits, that anything is possible...

Mushrooms and ninjas, anyone? Maybe we could throw in a little "Fa la la" there to represent the third sentence, too. I think this explains my obsession with them a little bit, though.

You know, mushrooms that are commonly used in scenes depicting magical worlds and ninjas that are just generally fabulous and also magical.

Did you rush off and take the test? What was your result?

Sunday, August 8, 2010

Wreck This Weekend: Post Four

My apologies for being away this past week. My husband tore his meniscus and had knee surgery last Tuesday so I've been a bit busier than usual. I've missed you so...

* * * * * * * *

I'm very proud to show you these journal entries for this week's installment of the Wreck This Weekend Mini Series.

There is one page in particular that I'm quite smitten with. It was a pleasant surprise to say the least--but I don't want to spoil the surprise so I'll let you read on for that one. Even the simple pages ended up giving me satisfaction when they were complete. I'm not sure why this surprises me, but it does. I did not give some of these projects the credit that they were due creativity wise. Just because it's something you used to do in elementary school doesn't mean it's silly or simple. Sometimes quite the contrary.

Also, if you haven't tried art journaling before, I fully recommend it. It's very theraputic. I love my Wreck This Journal because it gives me prompts for projects. That's a big part of my problem at times...I don't know where to begin. Once those creative juices are flowing, I'm good. It's just that sometimes I'm a slow starter. Anyone else have that problem?

Alright, that's enough jibber jabbering. It's time to Wreck This Weekend!

July 25th
It's surprising exactly how easy it is to find four letter words. For instance, there were 3 four letter words in that last sentence. There are the four letter words that you can say on TV and then there are the ones that you can't. I couldn't resist the urge to paint one word in particular using bright orange paint before covering it with other four letter words. I mean, do what makes you happy, right?

July 26th
My son was kind enough to lend me his nerf gun and some darts...although I'll have to replace the darts. They became casualties of the craftiness...

So, I missed on purpose a couple of times because the bottom of the page looked a little too white. Believe me, it looks WAY better with the intentional misses.

My painted fingers

July 27th
I didn't have a whole lot of time on the 27th. Good thing there are quicky pages in the book like this one.

July 28th
I love this page. Love it, love it, love it. Did I mention this is my favorite page? :)

And the best part is that this page happened completely by accident. I dripped a bunch of spots of paint onto the page, closed it, and when I opened it this is what I found. I was not going for butterfly, believe it or not. I really did just randomly drip a bunch of paint all over the page. Yeah. I'm as surprised as you are. Probably more.

July 29th
After a lame attempt at drawing a bed on the bottom of this page, I found an old Dr. Seuss book that the kids have a double of and cut out a page with some sleeping turtles on it to glue over the lameness. I like how it turned out.

July 30th
The funnel totally leaked out the bottom. Good thing I drank water out of it and not cranberry juice as I had originally intended...

Ahahahahahaha! I lifted my pinky while I was drinking! I didn't notice that until posting these pictures. How proper of me. Perhaps I should make up some tea.

July 31st
That was a lot of work for such a mild result! But, on the bright side, at least I burned a few calories that day.

There is still plenty of journal left so come back next weekend for another Wreck This Weekend Mini Series post!

Wednesday, July 28, 2010

It's Banner Time!!

(Not to be confused with Hammertime--although that is fun too.)

My blog was pretty plain until last week. There was just

Made in My Free Time
Sneak some creativity into life!

in big letters at the top.

Well, slowly I've been adding things like a Who That? page and a Blogtastical Goodness page. Take a look around. You might just catch me in my kookiness...you never know...

Anyway, part of this was designing the banner that you see above. Or (for when I change the banner in the future) this:

Click the image to see a larger version

I couldn't decide between a ninja and my rocker mushroom for a mascot. And while I'm a sucker for all things mushroom, I'm going with the pixelated ninja for now.

Also, since I am without Photoshop, I used Microsoft Paint to design the ninja. Ah, Microsoft Paint, how do I love thee and yet not at the same time. And then put it all together in Publisher. Not a bad way to go, but not the best either.

Honestly, I am just not happy with the quality that I've got going right now. It's too soft. But it's a start because it's more than just boring old words.

The ninja lets you know that you've got to stay on your toes. You never know what could pop out to thwack you with a throwing star. Because that's just rude.

Feedback? Good, bad, and indifferent: Bring it on!!

Sunday, July 18, 2010

Wreck This Weekend: Post One

As you know if you've been reading this blog lately (if not, catch up here), I purchased a copy of Wreck This Journal by Keri Smith at the beginning of July and made a commitment to do at least one page every day.

Well, I'm proud to report that after two weeks with it in my possession, I have stuck to that commitment and now I'd like to share the results with you!

But I don't want this post to just be a random, one time thing. I'm no where near finished with the book and I'd like to be able to keep sharing the pages that I create with you with some sort of regular frequency.

Also, part of the reason why I started this blog was to encourage my friends and family to get back in touch with their creative selves. What better way than to post pictures of what I've done each week from a book that has inspired me?

Motivation, my friends.

You each have your own unique perspective on the book's instructions--don't like what I did with my page? Make one yourself! And you don't go out and buy the book to do it, either. That's the fun thing about being creative. You can do whatever you want!

Let's get a little friendly competition going, too: Who can make the most colorful pages! Who's with me? Post a link to your page (blog page, photobucket/flickr account, wherever it is!)  in the comments section of this blog and we'll come take a look at it!

So with that and without further ado, I bring you a Made in My Free Time mini-series:

Wreck This Weekend

Once each weekend, I will post pictures from my Wreck This Journal entries so you can follow along with me! I encourage you to post comments and share your journals, too. Even if you don't want to compete. I would love to see your creations!

Here are mine from Week One:
 July 3rd
The first thing I do with a new book is crack the spine--blame it on the year I worked at the college bookstore. But don't worry former bookstore coworkers, I only cracked the spines on my own books. :)

 I'm thinking of coloring this page, but for now here's how it stands.

Too easy!!

 This one reminded me of making hand turkeys for Thanksgiving when I was in elementary school.

July 4th
I really wish that I had colored the strips before tearing them...

I numbered the book backwards. :)


Broke out the crayons for this page!

July 5th
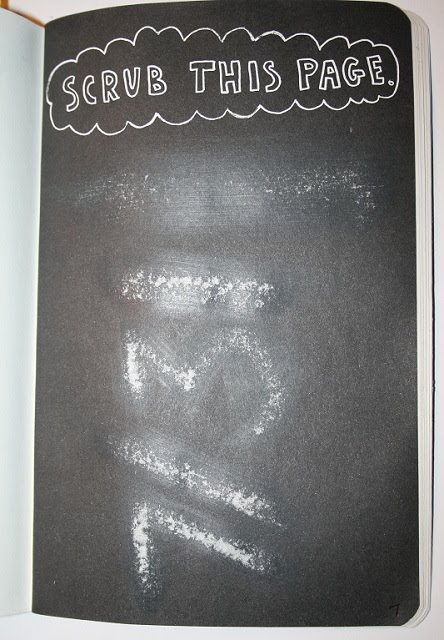
 This was fun. I spit, poured, and dripped coffee onto the page to make the design.  I wish that I had used regular coffee, though. I used a latte so the coffee stains aren't very dark. 

I went out hunting for a 4-leaf clover for this page. The rest are from around my house.

July 6th
Scribbling with different colored pens is fun. :)

July 7th
My morning shower has never been so invigorating.

No one said it had to be a solid sheet of newspaper.

July 8th
I flew this airplane before taping it to the journal. It didn't fly very far. Lame.

July 9th
 This was all that was left of the "Fold this page up, put it in your pocket, and run it through the wash" page.

Another page I'd like to color some more later.

July 10th
I sprayed the page with White Shoulders perfume. Now the whole journal smells pretty.

Next weekend I'll get you caught up with this week and so on until the journal is complete.

Keep an eye out for the Wreck This Weekend mini-series next weekend!

Tuesday, July 13, 2010

You've Got Mail!

So I had a fabulous idea yesterday that I couldn't wait to share with you!

While cutting the stamps off of my mail for a page in my Wreck This Journal, I realized that the envelopes my mail comes in could be used for something new.

Next time you get bills or other mail from businesses that come in security envelopes, take a look inside and you might be pleasantly surprised like me.

Or, I could just show you right now.

Yeah, let's do that.

Look through the window

See that? The inside of the envelopes have designs.


So I cut open the envelope and opened it up to see how I could use it.


Great timing! I just bought some small moleskin journals and immediately thought of covering one with the envelope paper.


To cover the journal completely, I had to use two envelope halves. Making sure to position the paper where I wanted it before applying any adhesive.

Easy flush edges: Make sure that the envelope paper is bigger than the journal. Wait to trim off the excess paper until after the glue dries using sharp scissors or an xacto knife.


Using my new favorite medium for paper:


I adhered the envelope paper to the outside of the journal.

I have found that the easiest way to do this is to apply the adhesive to one side of the journal at a time, pulling tight and smoothing down each side as you go. Squeegees, credit cards, and other long flat items are also useful for smoothing out any bubbles under the paper.


Then I allowed the journal to dry completely and cut the excess paper around the edges.


Next I added a ribbon which served two purposes*:
  1. Covered up the seam between the two pieces of paper.
  2. Adds a blast of color to the black and white pattern.
*Plus, orange is my favorite color so I'm always looking for ways to add a little orange to my projects!


See how I made sure to leave the ends extra long? That way there's plenty for wrapping to the inside of the journal cover.

Once the ribbon was positioned where I wanted it, I glued it to the outside of the journal! (I used clear Tacky glue for this part.) And then allow the glue to dry AGAIN.

Next, I trimmed the excess ribbon to about 2.5 inches and folded it over into the inside of the journal to be sure it would fit. Once I was sure it would fit tightly inside, I glued the remaining ribbon to the inside of the journal.


To protect the first pages from the glued ribbon, I slipped some small pieces of freezer paper inside.


Then, because the edge of the ribbon where I folded it over to the inside wouldn't lay flat, I clamped the journal shut.


After an hour of clamping, I removed the clip and placed the journal under a stack of heavy books to dry completely.

There's one less envelope in the dump today!